


TL;DR
- You’re on an AWS internal infrastructure test and need to get files out of the environment for report evidence.
- You have the ability to run commands in SSM , but inbound access to the target hosts is restricted.
- A few tools and some stuff you (probably) already know that can help!
The Problem
You’ve done a build review on a host and need to get files from a host, or need to access an application, for example, a Nessus instance running internally. There’s always evidence generated, but generally the hosts you’re working on may have outbound Internet access blocked by a firewall, or they are deep inside a network with no route out.
Assumptions:
- You are accessing the host via AWS Services Systems Manager (SSM).
- You have the appropriate SSM permissions over a Linux or Windows host inside AWS.
- The host has Python installed.
- You have the AWS CLI installed on your machine. This is available from AWS.
So, what is the solution?
Step 1: Authenticate to AWS
First, you need to authenticate to AWS. In the example below access has been provisioned via AWS Single-Sign On, which requires a few steps to get your AWS access keys. However, if you already have valid keys then you can skip to the AWS commands below.
To access your keys via AWS Single-Sign On, look for the “Access keys” link on the AWS access portal:
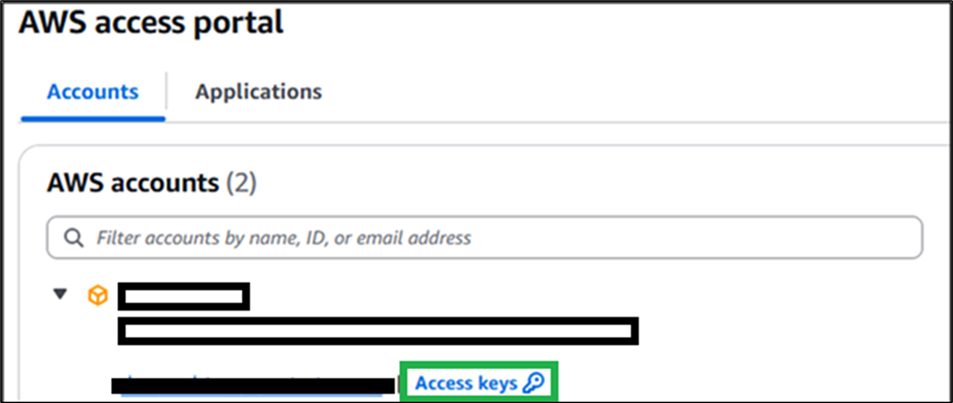
Figure 1: AWS access portal
Click on the “Access keys” link, which will give you the following:
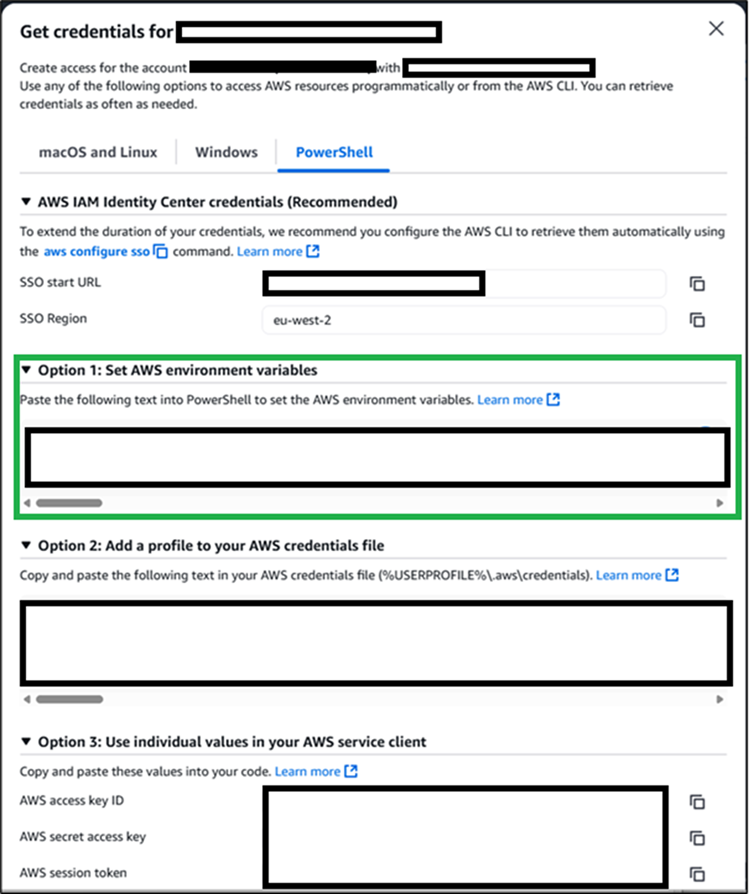
Figure 2: Get credentials
PowerShell is simple enough to use here. Go to the following:
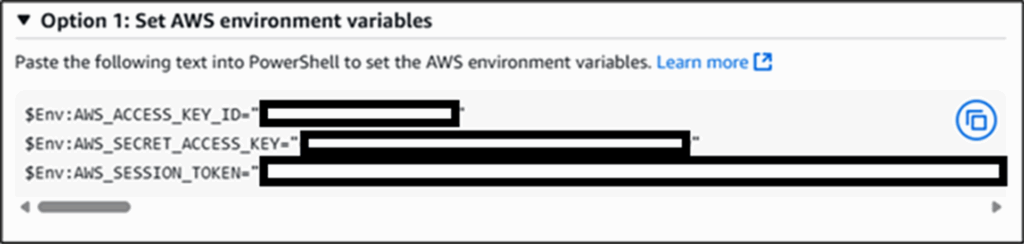
Figure 3: PowerShell environment variables
Clicking the copy icon on the right, will give you the commands and put them on your clipboard:
$Env:AWS_ACCESS_KEY_ID=”[REDACTED]”
$Env:AWS_SECRET_ACCESS_KEY=”[REDACTED]”
$Env:AWS_SESSION_TOKEN=”[REDACTED]”
Paste those into a PowerShell session and hit return. This sets your temporary credentials for AWS CLI access, which allow you to create the port forwarding session.
Step 2: Start an SSM port forwarding session
Now create an AWS port forwarding session using the following command:
aws ssm start-session –target <ID> –document-name AWS-StartPortForwardingSession –parameters portNumber=”8000″,localPortNumber=”8000″ –region <REGION>
Explanation of the parameters:
The following parameters need to be set, some you can get from AWS:
–target: This is the ID of the instance you’re trying to port forward to
portNumber: The port on the target host in AWS.
localPortNumber: The port on your machine that you will be connecting to in order to access the files or other service. Any port can be forwarded.
–region: The region of your AWS instance you’re working in.
Once you’ve got everything you need and have pasted it all into a PowerShell session, you should see something like the following:

Figure 4: Port forward session running
This means a port-forwarding session is created between your laptop and the instance entirely over SSM. No open inbound ports required.
Step 3: Transfer files using a Python web server
Now that you have a tunnel, you need a way to get files out.
In the example below, we want to get files from the server, so we run a Python web server:
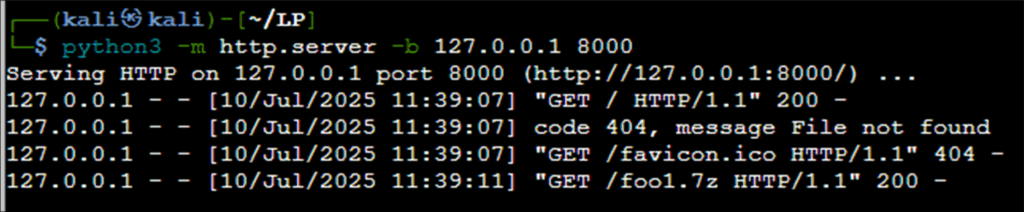
Figure 5: Setting up a Python web server to grab files from
For any files you want to transfer, use 7z and encrypt them. For example:
┌──(kali㉿kali)-[~/LP]
└─$ 7z a foo1.7z * -pPassword1234
(Use a better password, of course…)
Setting up a Nessus port forwarder is the same, except the portNumber is 8834, then any port for the local instance:
aws ssm start-session –target [REDACTED] –document-name AWS-StartPortForwardingSession –parameters portNumber=”8834″,localPortNumber=”8835″ –region eu-west-2
Accessing Nessus can be done via localhost on the laptop:
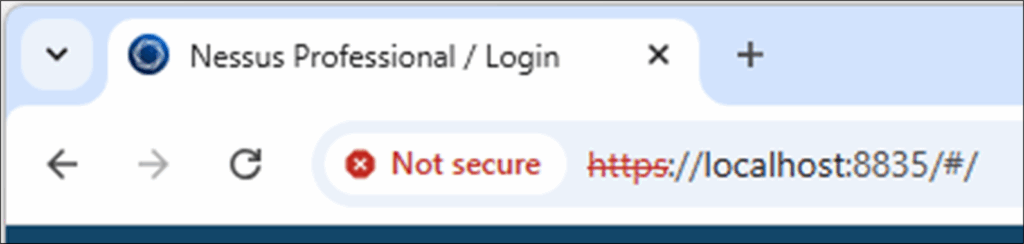
Figure 6: Accessing Nessus
Conclusion
SSM port forwarding is a clean and effective way to move files or access internal services in AWS without needing inbound access.
If you’re already using SSM during a test, this adds minimal overhead and keeps things secure.
Just make sure you encrypt anything you exfiltrate and tidy up when you’re done.
This is similar in concept to our previous blog post, where we used SSH to use a customer’s laptop as a conduit onto their network.
Shoutout
Thank you to my colleagues Eime Adomaviciute and Harvey Passingham for this blog post idea!


