


TL;DR
- Part one showed how to make a £2 key-finder beep with just Android and Linux.
- This time we step up with budget gear, using a Sonoff dongle for sniffing and a Nordic dongle for control.
- Together, they let you sniff traffic, identify characteristics, and send commands, turning key finders (and other devices) on and off at will.
- A cheap but powerful setup for learning BLE hacking before moving on to advanced tools.
We made it beep for free (ish)
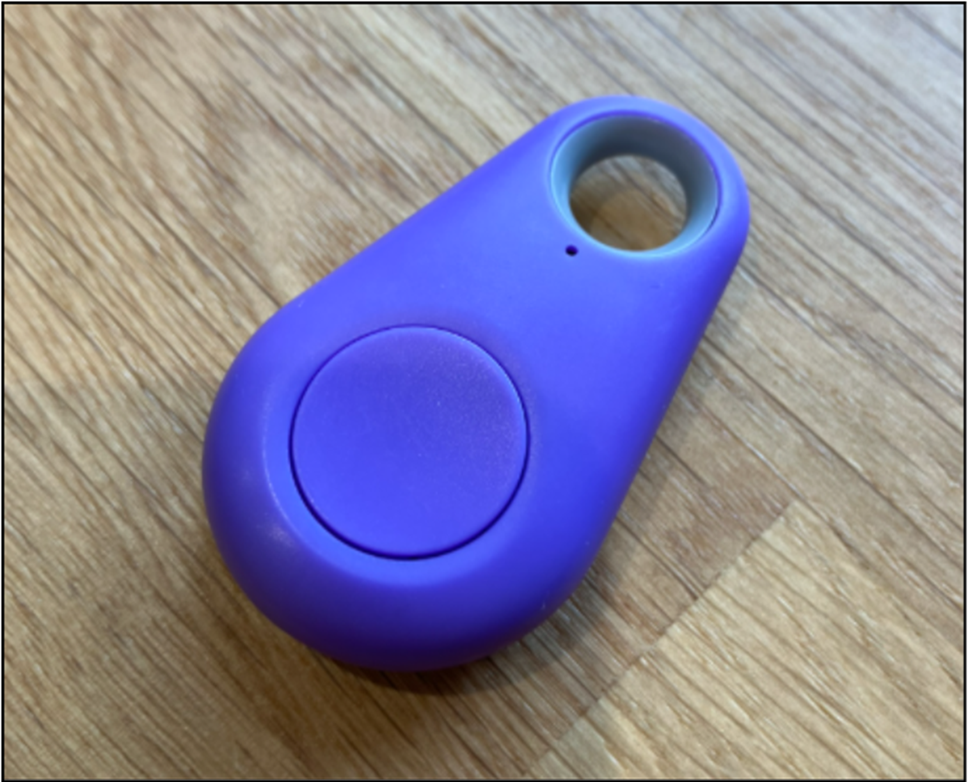
In part one we started hacking Bluetooth and made a little £2 key-finder beep using only Android and Linux. If you haven’t read that post, I would recommend it as a primer to the devices, BLE and what we’re doing, but TLDR we got them to go beep for free (more or less).
What’s next?
Now we’re deciding we’re serious about BLE hacking and we’re ready to splash the cash, so let’s redo that process with some limited equipment in hand. There are two main budget options for BT hacking I’d recommend:
What you will use
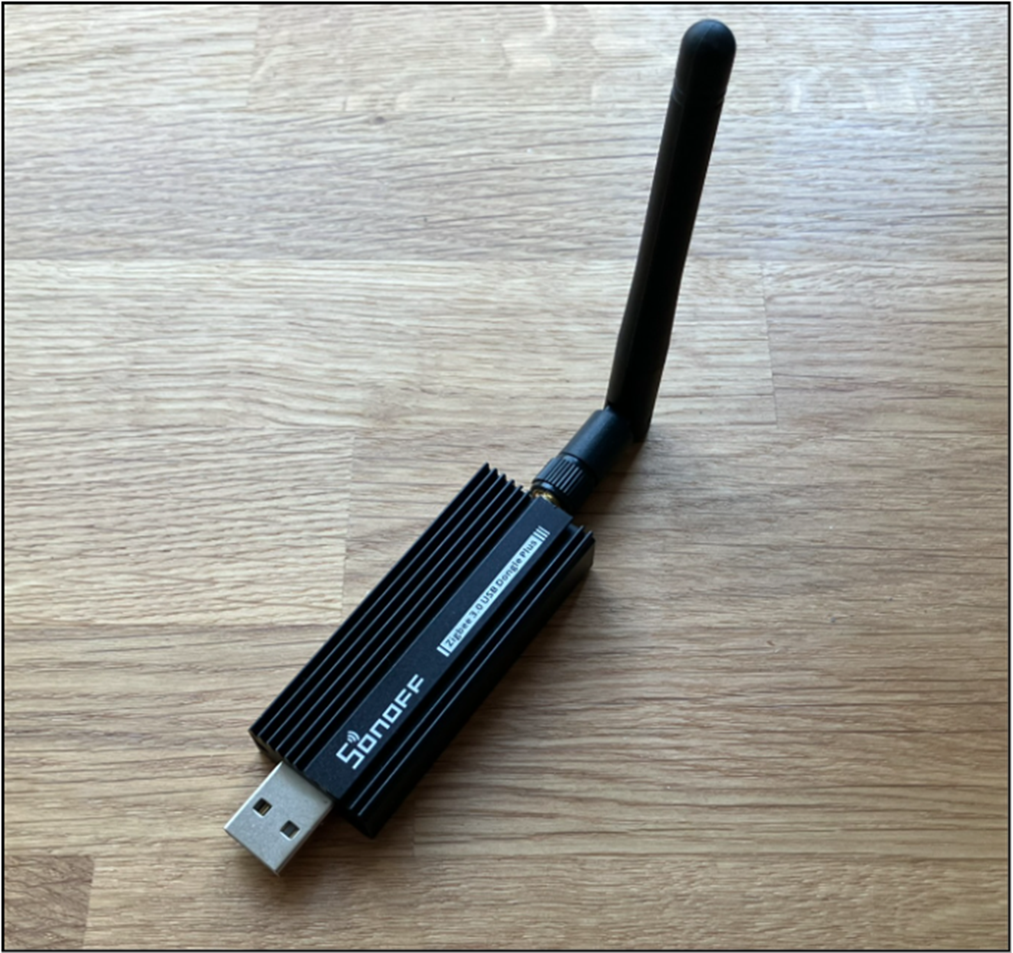
A Sonoff Zigbee 3.0 USB Dongle Plus (about £20). It is a repurposed Zigbee dongle with a CC26x2 chip that supports Bluetooth. After reflashing, it becomes a capable Bluetooth sniffer with limited send capability. Ensure the model is CC26x2 based before you buy!
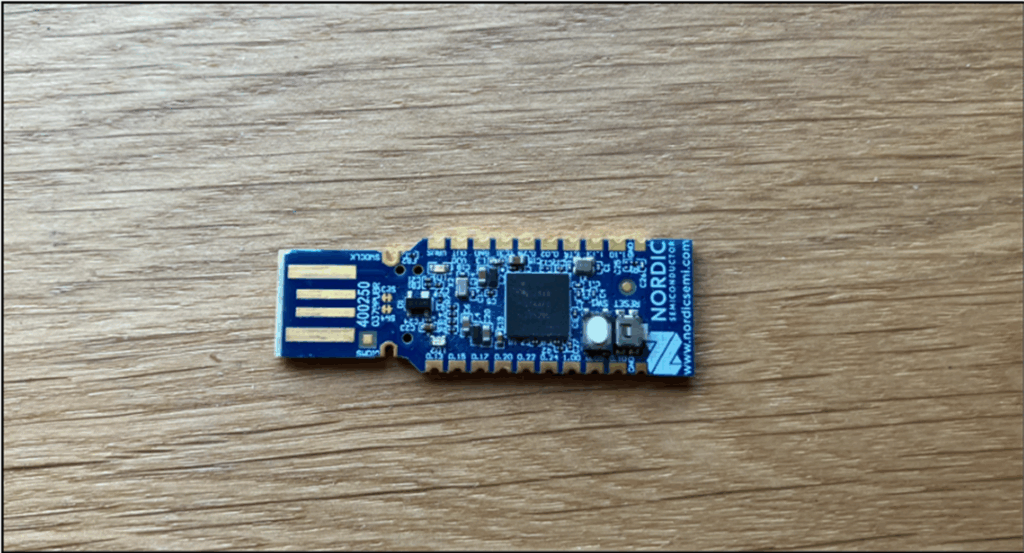
A Nordic mini USB dev board (around £10) A microcontroller regularly used for Bluetooth devices, with a strong suite of supporting tools.
I think one of each of these is a strong setup – the Sonoff lets us sniff BLE traffic and if the device doesn’t use pairing or bonding, it will all be accessible in cleartext, the nRF dongle lets us interact with BLE devices in quite powerful ways.
It’s actually possible to follow this tutorial using only one of the Nordic devices. They can be used to sniff BLE and interact with devices. The process can be found here. Though Nordic does have a habit of moving documentation.
There’s a problem with that though, the Nordic sniffer requires you to load a large firmware file onto the dongle and install a Wireshark profile and capture plugin. This is OK if you’re using a full-fat development kit, but to use these smaller (cheaper) dongles you need to wipe away the USB bootloader they contain. This means you’ll either need a JTAG programmer (like a Jlink) to then reuse the board for other stuff, or you’d need two devices so that one can be dedicated to being a sniffer and the other can be reprogrammed to talk to devices.
For me the Sonoff is cheap and more capable as a sniffer (better channel hopping and connection following performance), but I keep a spare nRF sniffer dongle around in the back pocket in case the Sonoff is playing up. If for some reason you end up stuck on Windows, using the Sonoff isn’t really supported, but the Nordic Wireshark plugin works fine. Ultimately, use whichever tool works best for you.
Sniffing the traffic with a Sonoff dongle and Sniffle4
Installing Sniffle is covered well on NCC’s GitHub page. Follow NCC’s instructions to install Sniffle and its Wireshark extcap script here. However if you want a TLDR, you get yourself a Linux box (mine’s Ubuntu) and do this:
if [  ! -d /opt/sniffle/Sniffle-1.10.0/python_cli  ]; then

        echo "[+] - Sniffle not installed! Installing at 1.10.0..."

        sudo mkdir -p /opt/sniffle

        sudo chown -R $USER:$USER /opt/sniffle

        pushd /opt/sniffle

        wget https://github.com/nccgroup/Sniffle/archive/refs/tags/v1.10.0.tar.gz

        tar xvf v1.10.0.tar.gz

# Install Wireshark extcap for user and root only

mkdir -p $HOME/.local/lib/wireshark/extcap

        ln -s /opt/sniffle/Sniffle-1.10.0/python_cli/sniffle_extcap.py $HOME/.local/lib/wireshark/extcap

        sudo mkdir -p /root/.local/lib/wireshark/extcap

        sudo ln -s /opt/sniffle/Sniffle-1.10.0/python_cli/sniffle_extcap.py /root/.local/lib/wireshark/extcap

        popd

    else

        echo "[+] - Sniffle already installed at 1.10.0"

    fi
This will install Sniffle for you and also install the Wireshark plugin for both root and the current user.
You’ll need the custom firmware installed on the dongle, again well documented by NCC, but for your benefit the commands on my Ubuntu box were:
pushd /opt/sniffle/

wget https://github.com/nccgroup/Sniffle/releases/download/v1.10.0/sniffle_cc1352p1_cc2652p1_1M.hex

git clone https://github.com/sultanqasim/cc2538-bsl.git

cd cc2538-bsl

python3 -m venv .venv

source .venv/bin/activate

python3 -m pip install pyserial intelhex

python3 cc2538-bsl.py -p /dev/ttyUSB0 --bootloader-sonoff-usb -ewv ../sniffle_cc1352p1_cc2652p1_1M.hex

deactivate

popd
This allows you to just open Wireshark, plug in the dongle and start sniffing. The traffic here looks a lot different and will include a whole load of other stuff in your local Bluetooth environment vs the Android sniff we did in the last post.
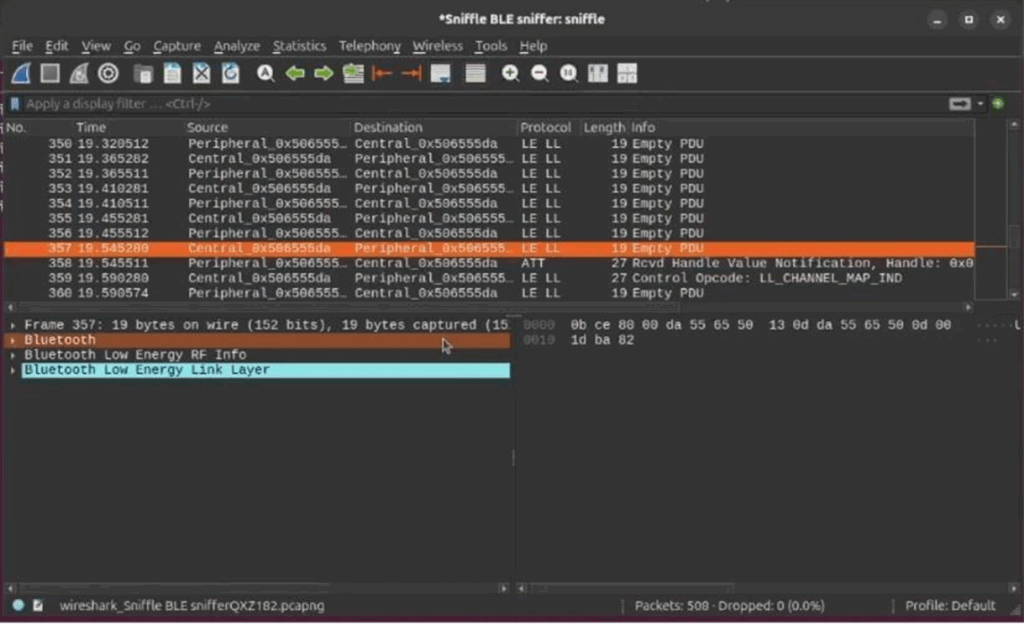
Because the devices don’t use pairing or bonding, there is no encryption. This means that even though our sniffer has nothing to do with the BLE connection (unlike last post where we sniffed on the Android device, which is part of the legitimate conversation) we can still view traffic between the target device and the phone.
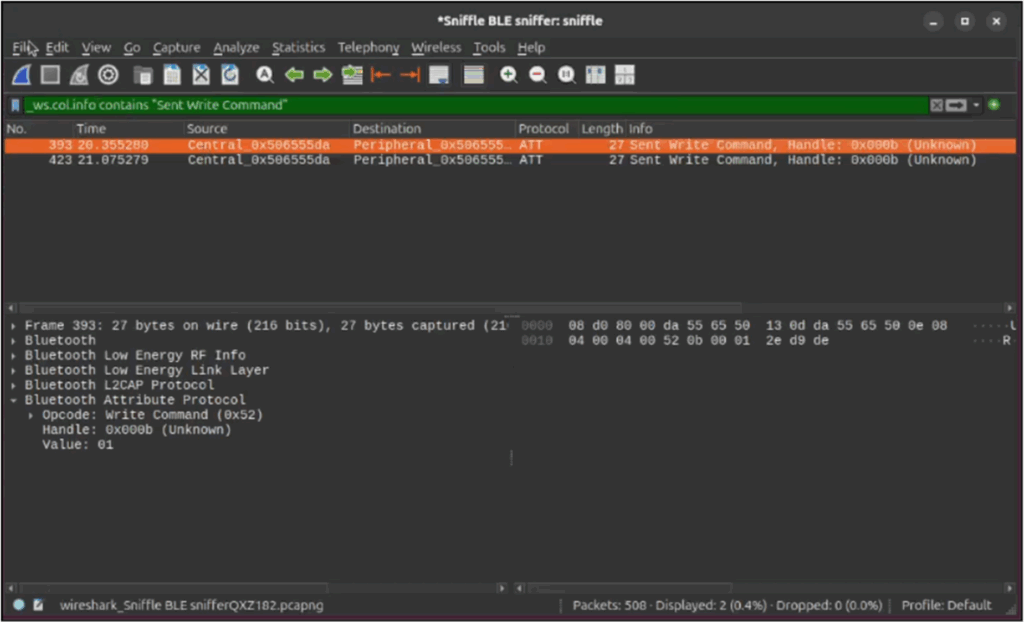
To do this, we can filter for _ws.col.info contains “Sent Write Command” to find any characteristic writes. I did this while triggering the tag alarm and I saw the two characteristic writes we identified in the previous post, just displayed slightly differently. First up 0x01 was written to handle 0x0b:
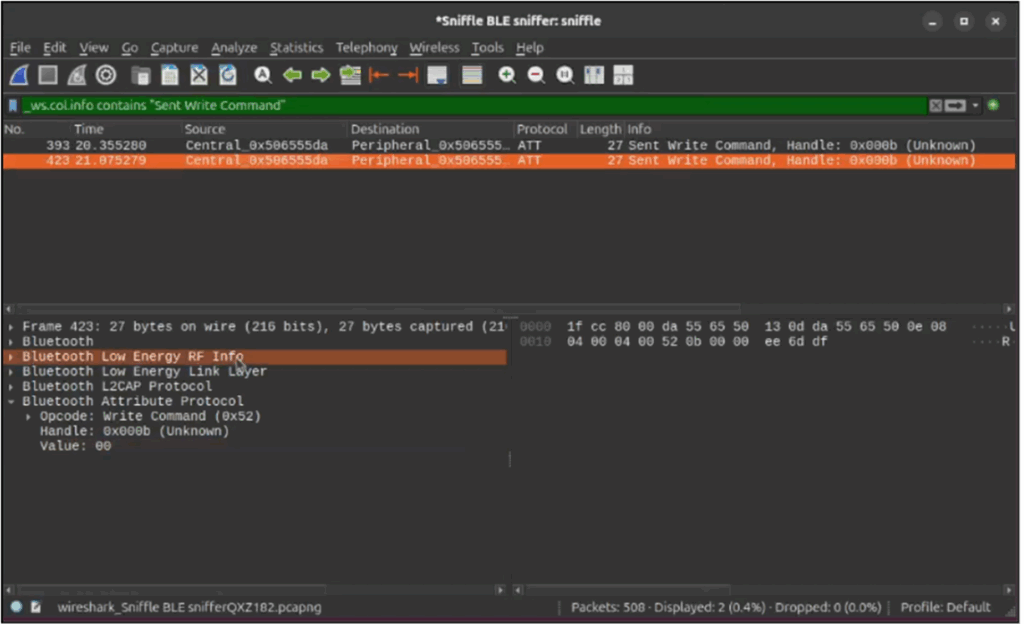
Then the 0x00 write to the same handle to cancel the alarm:
Personally, I really like the way Sniffle captures can be displayed and filtered in Wireshark, and I’ve got comfortable using it. If we wanted, we could have run this instead of the Android sniff in our last post, or alongside it as a backup. Using Sniffle is also really nice if you need to use e.g. a Windows app to talk to the device, where sniffing is notoriously difficult compared to Android.
With Sniffle, you’re also free to sniff in a terminal if you want/need:
python3 scanner.py --output scan.pcap

# Only devices with very strong signal

python3 scanner.py --rssi -40

# Only for advertisements with a string in them

python3 sniffer.py --string "banana" --output sniff.pcap
You can also check out the other tools in that directory, some allow you to send some very limited BLE data or advertise.
Controlling the device with a Nordic nRF52 dongle
This time we’ll use the Nordic dongle to control our device, we just need to send the data we just sniffed to the right places.
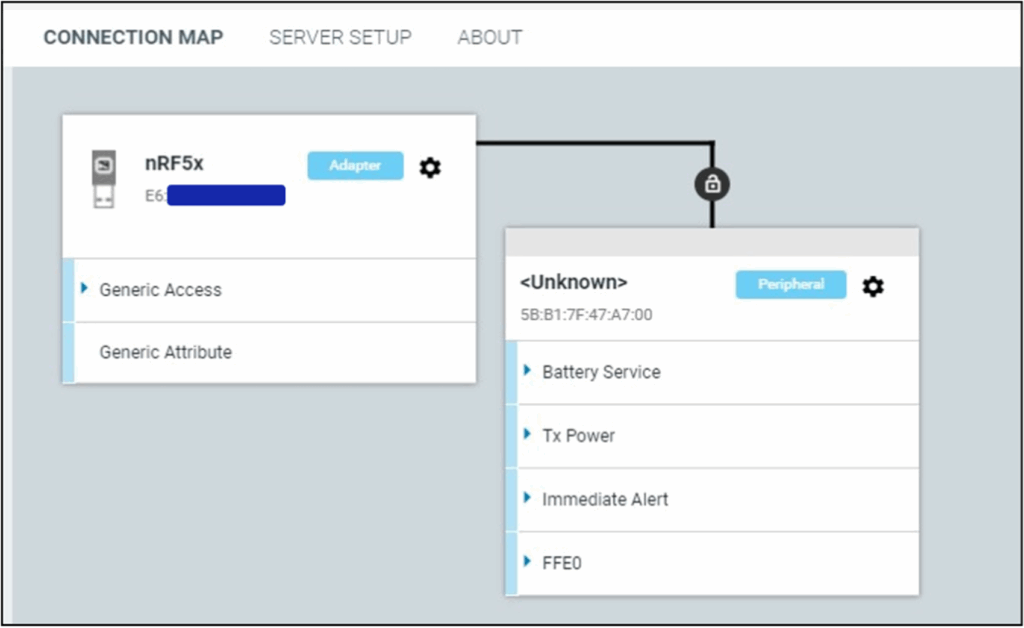
I like using the Nordic desktop suite (nRFConnect) which includes a BLE standalone application. To get started, you open the app and plug in your dongle, then select the dongle in the top left of the window; it will be flashed with firmware automatically if needed. Once the device is selected, you can hit ‘scan’ and you’ll get the device view shown below:
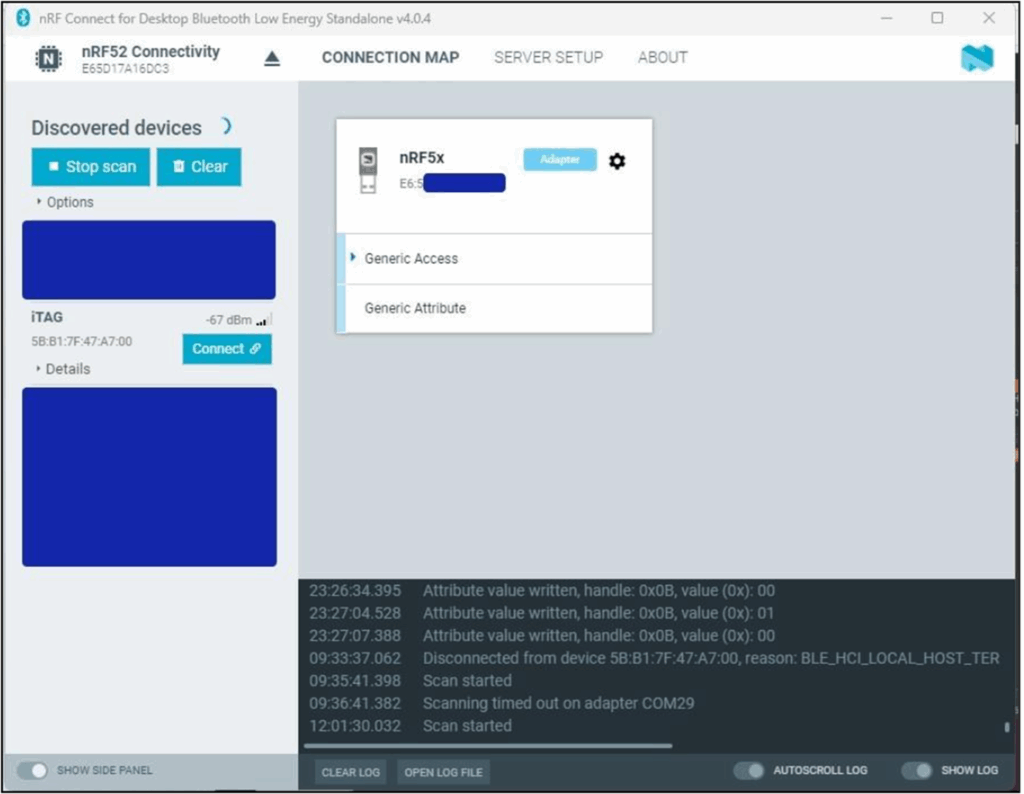
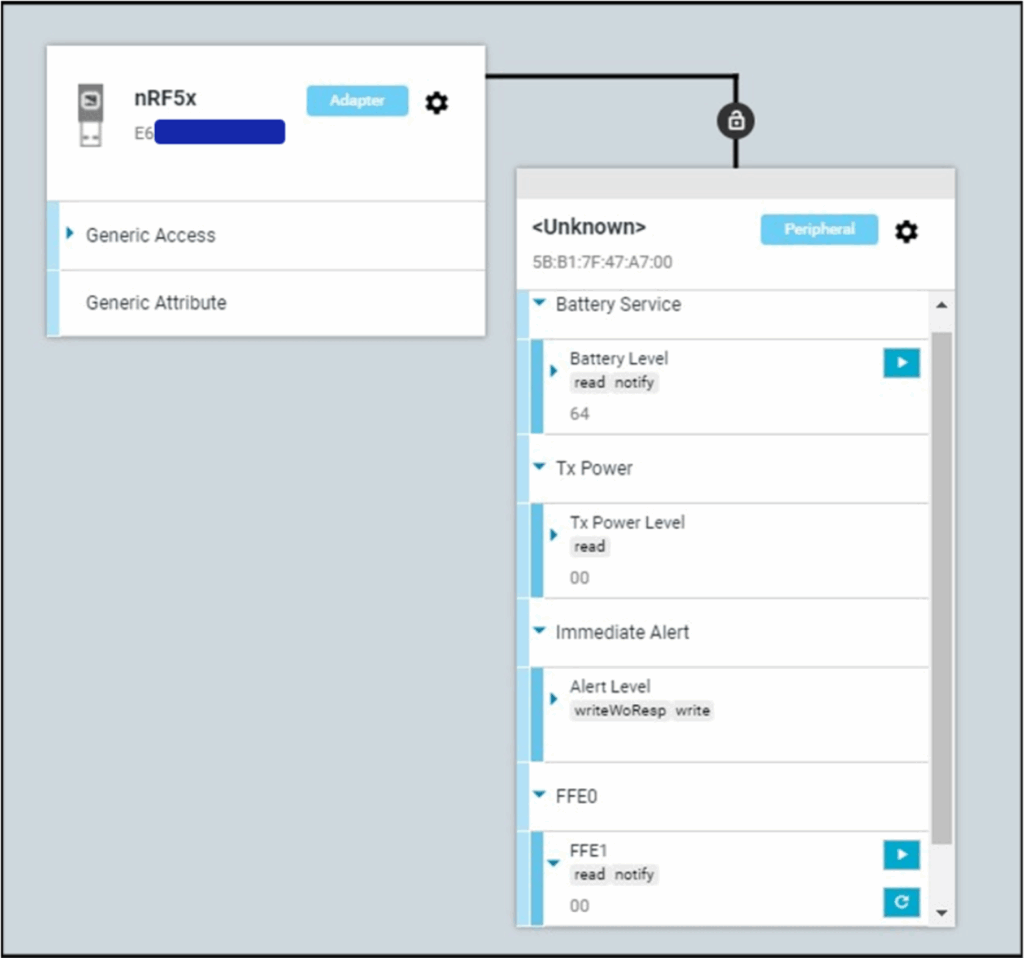
Once you identify your device, just hit connect and you can see the device’s GATT structure visually:
Here you can expand all the characteristics and read, write or subscribe (notify) to them.
We see the friendly name ‘Alert Level’ for our capability and can write to that characteristic by entering data and pressing the tick:
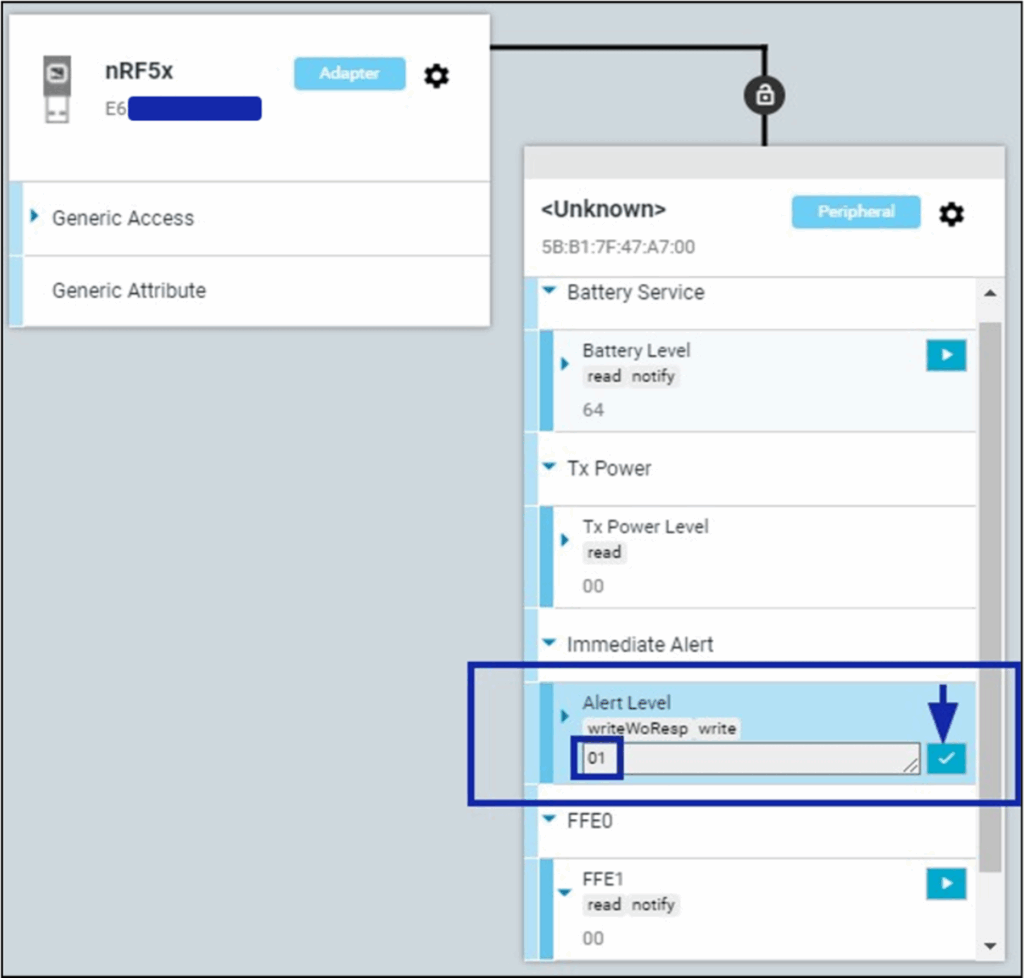
And the alarm will sound, Magic! Send a 00 to turn off the alarm.
I find this more reliable than Gatttool by far and a little easier workflow-wise than Android. It’s better for screenshots, and it’s easier for me to get my head around.
You can also script connections using blatann, even from Windows. Here’s a little Python snippet to turn our beeps on and off:
import time

import blatann


# CONFIG

COM_PORT = "COM29" # Replace with your COM port, check devmgmt.msc in Windows

TARGET_MAC = "5B:B1:7F:47:A7:00"  # Replace with your device MAC address

target_address = blatann.peer.PeerAddress.from_string(TARGET_MAC+ ",p")


# CONNECT TO COM PORT

ble_device = blatann.BleDevice(COM_PORT)

ble_device.configure()

ble_device.open()


# CONNECT TO TARGET DEVICE

print(f"[-] Connecting to {TARGET_MAC}...")

peer = ble_device.connect(target_address).wait()

if not peer:

    print("[!] Connection failed.")

    ble_device.close()

    exit(1)


print("Connected. Discovering services...")

peer.discover_services().wait(5, exception_on_timeout=False)

for service in peer.database.services:

    if service.characteristics[0].attributes[1]._handle == 0xb:

        print("[!] Beeping.")

        service.characteristics[0].write(b'\x01')

        time.sleep(2)

        print("[+] And relax.")

        service.characteristics[0].write(b'\x00')

        time.sleep(4)

        print("[!] Beeping. Again.")

        service.characteristics[0].write(b'\x01')

        time.sleep(5)

        print("[+] Relax frfr.")

        service.characteristics[0].write(b'\x00')


# DISCONNECT GRACEFULLY

print("[-] Disconnecting. You'll get beeping now, press button to stop it.")

time.sleep(2)

peer.disconnect()

peer.wait_for_disconnect()

ble_device.close()

print("Bye.")
Look Forward
Hopefully you can see how this may be useful for more complex devices and interactions, particularly those where you may need to encrypt payloads to send to a characteristic or fuzz a characteristic. I also find this approach more reliable and dynamic than the free tier.
All I feel we’re missing here is that command-line flow we love as hackers. When I first heard about this Ubertooth thingy, I was expecting a Bluetooth shell we could use to do recon and hack on devices, but I was disappointed to find it basically did what Sniffle does for us now.
In the next instalment of the Bluetooth hacking series, I will introduce you to a more expensive setup that I believe comes closest to my dream of the hacking shell I envisioned when the Ubertooth was first released.
If you are considering buying something based off this post, go ahead and pick up a Sonoff, you won’t regret that, but you may want to hold off on the Nordic dongle until the next post…


