


TL;DR
- Use Windows Thumbcache to reveal deleted or hidden images.
- How thumbnail cache can uncover user activity and insider threats.
- Reconstruct activity through cached thumbnails.
Introduction
Windows thumbnail cache, or thumbcache, is a well-known forensic artifact, but often one that is overlooked. The thumbcache stores small previews of images, videos and documents and can persist even after the original files are deleted, which offers analysts an opportunity to uncover traces of user activity. In this blog, we will show how DFIR analysts can use thumbcache forensics to extract and interpret thumbnails, even when files are ‘gone’.
Windows Thumbcache
Windows creates thumbnails for media content like images and videos to enhance the user experience, these thumbnails are stored in a database on a user’s machine. If a file is deleted, it’s associated thumbnail may still remain in the cache, making it a valuable forensic artifact.
Thumbnail creation: These thumbnails are created when a user views or interacts with a directory containing media files. Windows will generate thumbnails for those images and store them in dedicated databases e.g. thumbcache_1280.db for 1280 pixel wide thumbnails.
Forensic significance
- Thumbnails remain cached even if the original file is deleted, allowing analysts to identify deleted content.
- Metadata within thumb cache files can include original file paths, helping determine where a file was accessed.
- Cached thumbnails can reveal what a user has viewed, even if it is later deleted, moved or hidden.
Determining user interactions
How was the file viewed? The specific Thumbcache file in which a thumbnail appears can provide insight into how the user was interacting with that file. For example, thumbnails stored in the Thumbcache_1280.db are files which are likely to have been viewed by the user in a large preview mode e.g. opening the file with media viewer applications such as Windows Media Player.
However, thumbnails stored in Thumbcache_96.db proposes the thumbnails stored here may derive from the end user accessing a directory containing files and they may not have been opened with an application to view the full size image.
If the original file has been deleted but its thumbnail is in the thumbcache, it shows that the file was accessed at some point. High-resolution thumbnails (like those in thumbcache_1280) often suggest the file was viewed by the user, while low-resolution thumbnails (such as thumbcache_96) can be generated during regular browsing.
Analysis of the Thumbcache: Tools and techniques
Locate the files: These databases are stored in the below location: %USERPROFILE%\AppData\Local\Microsoft\Windows\Explorer
Extract and parse the files: We have used a free GUI based tool, Thumbcache Viewer, for parsing the thumbcache files and extracting thumbnails.
For testing purposes I created the following images, one of which has been ‘permanently deleted’ and another which has been ‘hidden’.
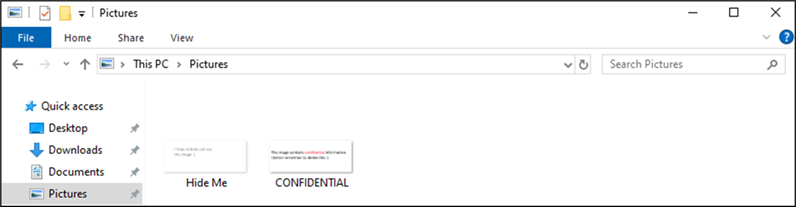
Figure 1: Test Images
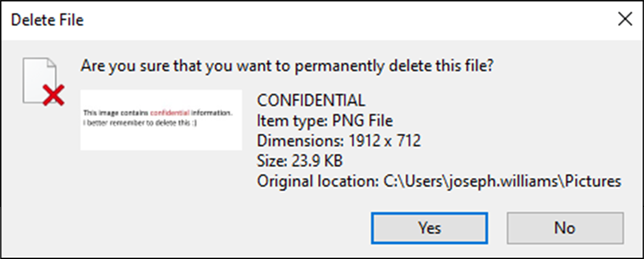
Figure 2: Deleted Image
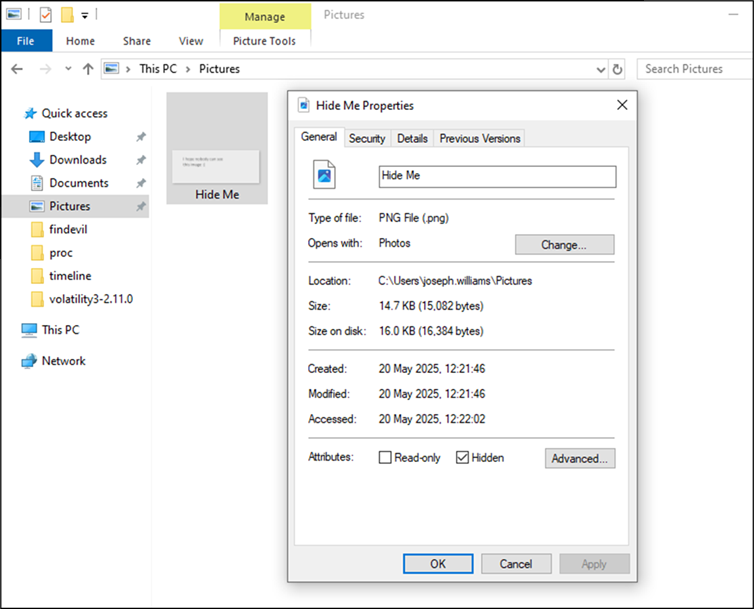
Figure 3: Hidden Image
So, that’s our ‘CONFIDENTIAL’ image permanently deleted, and our ‘Hide Me’ file hidden. Now let’s extract and analyse the thumbcache. Browsing to the location which they reside and traversing the directory, we can see a list of iconcache and Thumbcache databases. We will save the Thumbcache_1280.db file to view high-resolution thumbnails.
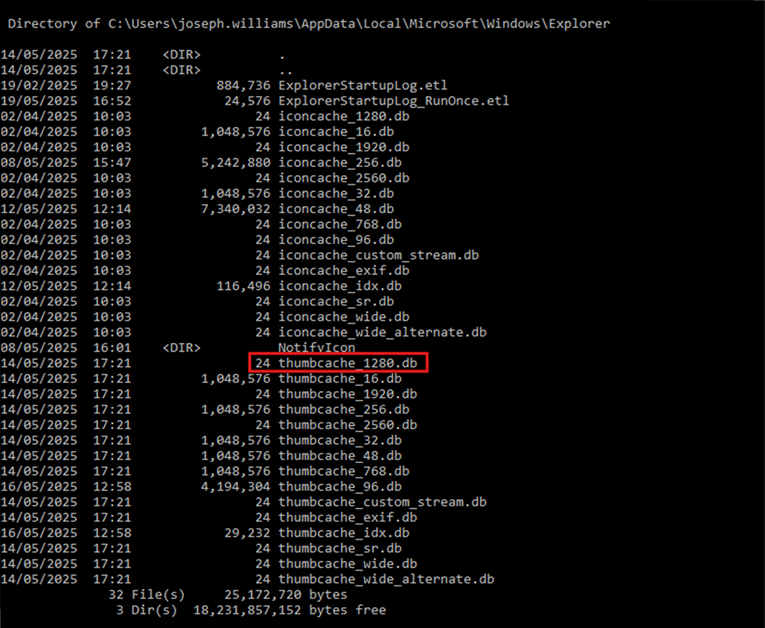
Figure 4: Thumbcache Directory
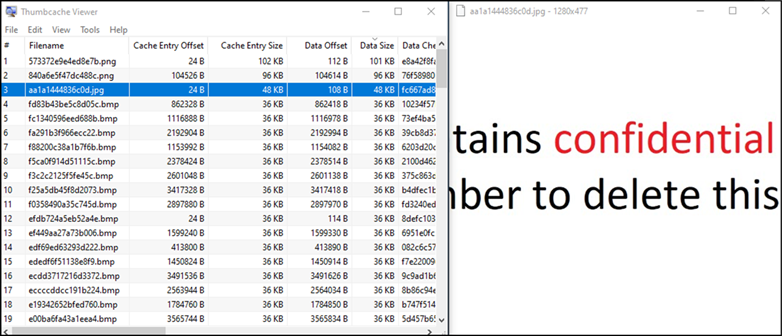
Figure 5: Deleted Image Thumbnail
Using Thumbcache viewer, we can open our Thumbcache database file and view the contents; The above image looks like it could represent our deleted image, let’s save this file from the thumb cache and place it on our desktop.
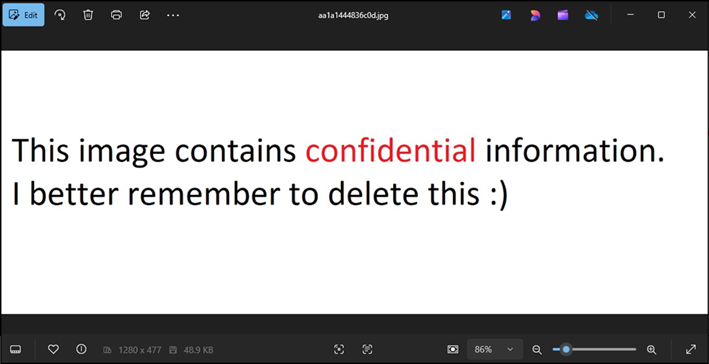
Figure 6: Deleted Image
Here is our cached version of the image we deleted earlier, now present on the desktop thanks to the thumbcache database.
Now let’s look for the hidden image…
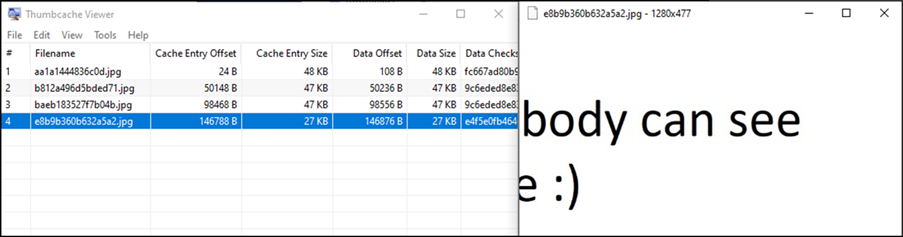
Figure 7: Hidden Image
Again, browsing the Thumbcache database in Thumbcache viewer, it looks like the above file could be the thumbnail associated to our hidden image, we can save this to the desktop too and verify it’s the image we are looking for.
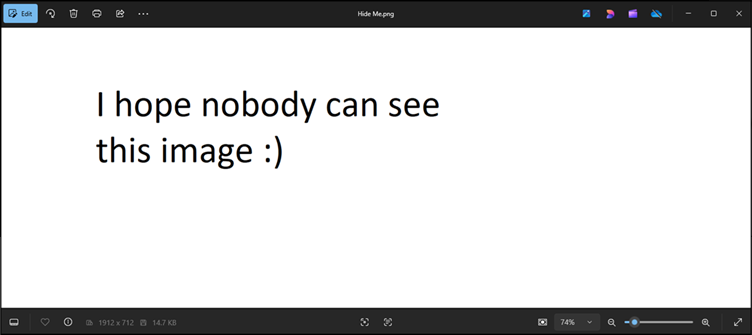
Figure 8: Hidden Image
There’s the image, but we still don’t know where the original is hidden, so how can we find out where it actually resides?
Going back to thumbcache viewer, we can use the ‘map file paths to cache entry’ in an attempt to identify the file location, scanning the C:\ directory for file types of interest, this tells Thumbcache Viewer where to look for image files whose thumbnails might match those in the cache.
We now have 14 files that have been mapped to their original location, let’s see if we can find Hide Me.jpg.

Figure 9: Mapped Files
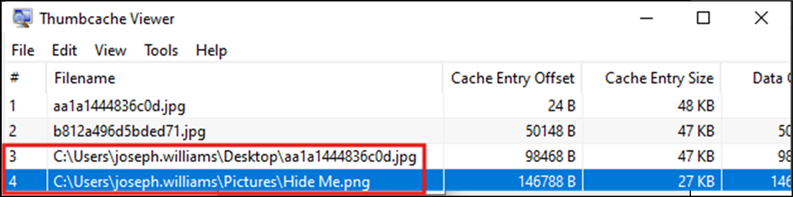
Figure 10: File Path
So, there we have it, the full file path for the hidden file and recovery of the thumbnail related to the permanently deleted file. To verify the location of the hidden file, let’s take a look:
Running dir /a:h from the command line, we can list all hidden files in the current directory.
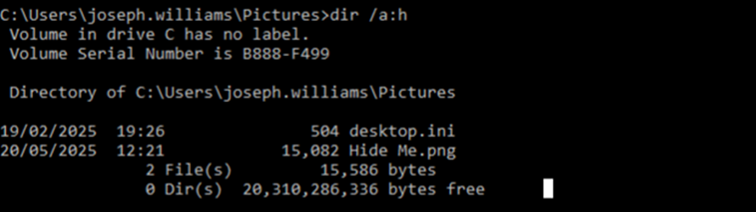
Figure 11: View Hidden Files
Alternatively, using the file explorer, we can simply select view and tick hidden items, which verifies the presence of the hidden file that was pointed out to us by thumbcache viewer.
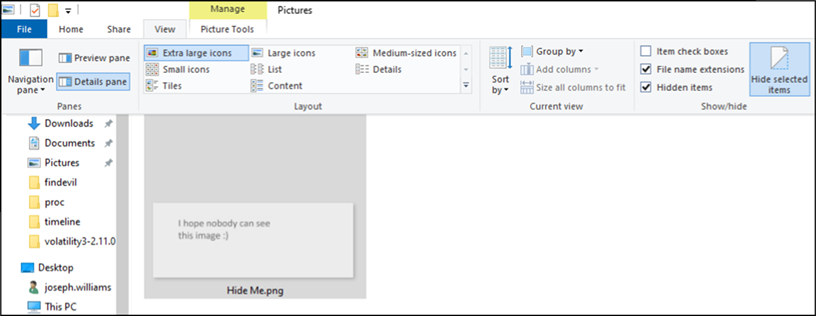
Figure 12: View Hidden Files
Tools used:
- Thumbcache Viewer
Use Thumbcache, but don’t forget the rest of them!
The real significance for any forensic artifact comes when combined with other artifacts, Shellbags for example (more about Shellbags in my blog post here). Shellbags record when and how a user has opened a folder while the thumbcache shows files that were displayed as thumbnails and the times they were generated.
By correlating shellbag timestamps for a folder with thumbnail timestamps for files in that folder, you can confirm that a user not only accessed the directory but also viewed specific files. This is useful when original files have been moved, deleted or hidden. Shellbags give the folder context and time where thumbcache shows the visual evidence of file access.
When combined with other artifacts (e.g. Prefetch, UserAssist, Jump Lists, USN Journal, $MFT records, LNK files, Shimcache… the list goes on), we can generate a comprehensive, verifiable timeline of events, evidencing file access, user behaviour and system interactions.
Real-world example: Insider threat and document theft
In a recent case, we investigated an incident where unauthorised access and deletion of confidential documents was suspected. An employee was accused of tampering with sensitive files just before their resignation. They denied any wrongdoing and we were tasked with reconstructing a timeline of events construed from the company issued machine.
1. Initial access to restricted folder
- Shellbag evidence
Shellbag entries showed the user had accessed the restricted folder. It was evidenced that the user had been folder-level browsing in explorer.
- Thumbcache creation
High-resolution thumbnails from thumbcache_1280.db were present matching the content of several confidential files from the unauthorized folder, which was accessed, evidenced by shellbag analysis. This confirmed the user had previewed or opened these files inside the folder.
2. Repeated access and file viewing
- Shellbag updates
Shellbag entries continued, with new access timestamps for the same folder, suggesting the user had revisited the folder to view its contents.
- Thumbcache validation
New thumbnails for additional files inside the folder were found in the thumbcache, this confirmed more files were opened or viewed during this session.
- Prefetch files
Prefetch files showed the launch of applications such as Adobe Acrobat Reader and Microsoft Excel, which are both associated with the opening of files we suspected were opened, these launches were timestamped shortly after folder access and just before thumbnail creation indicating intentional viewing.
3. File deletion
- USN Journal activity
The NTFS USN Journal showed the deletion of multiple confidential files from the folder in question, this provided evidence of file deletion.
- Event logs
Security event logs recorded event ID 4660 entries, showing file deletion actions which corresponded to the deleted documents, this helped verify the evidence of when and how the deletion of data occurred.
Conclusion
Thumbnail forensics is a practical, evidence-rich technique when used with corroborating artefacts. Thumbnails themselves are valuable, but they are strongest when presented as part of a wider chain of evidence.


