Blog: Android
How to Hack the Hudl – We give Rockchip a good seeing to
If you were to have a list of devices that should not go anywhere near a corporate network, or access your Gmail, LinkedIn etc. from, make sure that supermarket Android slabs are on it. They are bad news whether you’re a corporate BYOD user, or a regular homebody who wants a budget tablet. Retrieving credentials is trivial, whether they’re for your Twitter account or your corporate domain.
Why so serious?
There’s no sugar coating this: If you want a device where you can read everything direct from memory (that’s a bad thing BTW) then these babies are the very thing. The device we’re looking at is Tesco’s Hudl tablet, but the problem extends to all mobile gadgets running the Rockchip chipset.
In this post we’re going to show you how easy it is to attack a device that has been plugged into a network, to retrieve all that lovely sensitive data. It involves a slightly fiddly hardware attack to put it in Flash mode, before going straight into memory access and retrieval. We don’t even need to bypass a PIN code.
Basically this attack is all about abusing Flash mode on Rockchip based devices to read the contents of the SSD. If you haven’t already thought “WTF?” I’ll repeat that last bit: Abusing the Flash mode of Rockchip based devices to read the contents of the SSD.
Let’s talk about Rockchip
Rockchip is a series of system on chip integrated circuits that pretty much comprise of an ARM processor and simple interfacing to disparate hardware. This allows hardware manufacturers to quickly create cheap devices that can run Android or similar low powered OSs, including Kali.
Just to show it in use, we can see the main IC, mounted on an MK809 TV dongle:

If you check the Wikipedia page about Rockchip, it lists a selection of devices that use Rockchip, most of these are smaller tablets that I’ve never heard of, but there are some interesting names: HP Slate 7, Toshiba Excite 7 and the Tesco Hudl.
Now, a lot of people own a Hudl, 500,000 people in fact, and I’m one of them, although I mainly use it as a wall mounted clock and music player in my home office. Here it is in a photo showing that I really need to repaint my walls:
So, what’s the problem with Rockchip? This problem is something called Flash mode (and also mask mode, but we’ll talk about that later). This is a special mode of the chip which allows its firmware and the internal NAND of the device to be written to.
Now there’s nothing fundamentally wrong with this, after all Android has fastboot, which is an official server and protocol for Google branded phones; Samsung has Odin which is similar to fastboot; but, there are two problems with Rockchip’s flash mode:
- It does not have a form of OEM lock/signed only writes.
- It allows the reading of data from the internal NAND of the device.
The first allows us to take a device and upload a maliciously constructed partition (an evil maid attacker). The second allows us to directly read the contents of the device!
Internally most modern phones have an internal NAND chip which acts as a solid state disk. Android splits this up into partitions that are designed for specific purposes. The one we’re interested in is the userdata partition, which mounts at /data on Android and contains all the device’s apps and data, basically it’s heart, brain, and soul.
How do we read this data?
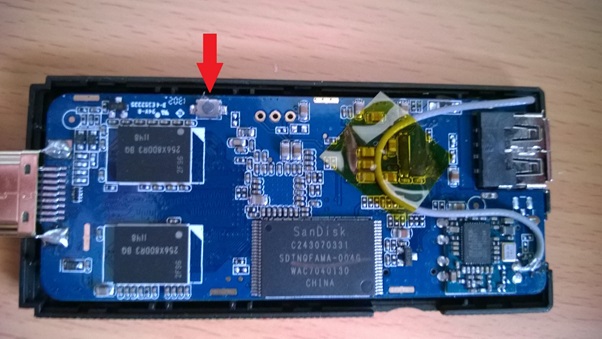
The first step is to put the device into flash mode. This is usually performed by pressing a button whilst the device is being powered on. On the Hudl this is achieved by holding down Volume Up, while doing a hard reset on the “hidden” reset button. I use a SIM card removal tool as it’s about the right size. The end of paperclip will work too.
These buttons are device dependent, as an example, here are the locations from the three Rockchip devices I own.
The Hudl, press and hold volume up and put a pin in the hole:
For an MK808 (my version actually runs Kali, but that’s a story for later), press and hold the button with a pin whilst inserting the USB cable that provides power:
For an MK809, remove the cover and press the button mounted on the circuit board whilst inserting the USB power cable:
Getting this to work is a bit of a fiddle and it has a habit of stopping working for no obvious reason
What can happen in Flash mode?
Once the device is in Flash mode, it can be accessed using a selection of software tools, including the official Rockchip Batch Tool. I don’t use this as the drivers are quite dodgy and don’t like 64 bit Windows. Fortunately the protocol has been reversed engineered by the community and you can get an open source command line tool for Linux, rkflashtool. Unfortunately its command line interface isn’t the best (I keep meaning to fork it and rewrite it).
The first step is to make sure you’re connected by dumping the parameter block, which is the first block on the NAND and contains the boot command line, which includes the partition table (this sample is from an MK809):
rkflashtool: info: rkflashtool v5.2
rkflashtool: info: Detected RK3066…
rkflashtool: info: interface claimed
rkflashtool: info: reading parameters at offset 0x00000000
rkflashtool: info: rkcrc: 0x4d524150
rkflashtool: info: size: 0x0000025b
FIRMWARE_VER:4.0.4
MACHINE_MODEL:rk30sdk
MACHINE_ID:007
MANUFACTURER:RK30SDK
MAGIC: 0x5041524B
ATAG: 0x60000800
MACHINE: 3066
CHECK_MASK: 0x80
KERNEL_IMG: 0x60408000
#RECOVER_KEY: 1,1,0,20,0
CMDLINE: console=ttyFIQ0 androidboot.console=ttyFIQ0 init=/init initrd=0x62000000,0x00800000
mtdparts=rk29xxnand:0x00002000@0x00002000(misc),0x00004000@0x00004000(kernel),
0x00008000@0x00008000(boot),0x00008000@0x00010000(recovery),0x000C0000@0x00018000(backup),
0x00040000@0x000D8000(cache),0x00100000@0x00118000(userdata),0x00002000@0x00218000(kpanic),
0x00100000@0x0021A000(system),-@0x0033A000(user)
Of most interest here is the partition table listed on the command line, the format is size@offset(name), so for, say the kernel partition:
This means that the partition starts at block 0x4000 and is 0x4000 blocks in size. A block is 512 bytes, this allows us to calculate the partition table:
Partition |
Start |
End |
| Misc | 0x2000 | 0x4000 |
| Kernel | 0x4000 | 0x8000 |
| Boot | 0x8000 | 0x10000 |
| Recovery | 0x10000 | 0x18000 |
| Backup | 0x18000 | 0xd8000 |
| Cache | 0xd8000 | 0x118000 |
| userdata | 0x118000 | 0x218000 |
| kpanic | 0x218000 | 0x21a000 |
| system | 0x21a000 | 0x33a000 |
| User | 0x33a000 | 0x1000000 |
(The user partition ends at the end of the storage, which is 8 GB on this device, which in 512 byte blocks works out as 0x1000000.)
Without going into too much detail about the internal gubbins of Android; the most important partitions to us are:
- system – this contains the Android operating system, which is normally mounted as read only. We can use this to read the OS, write custom binaries (such as a copy of su) and then flash it back to gain root access to the device.
- userdata – as mentioned above, this is the data partition which contains all the apps, their files and all user configured files.
- user – this is the virtual “sdcard” for the device, which is where Android will store shared data such as photos and music.
The extraction
Once we know where they are we can extract those partitions using rkflashtool to read it to a file:
rkflashtool: info: rkflashtool v5.2
rkflashtool: info: Detected RK3066…
rkflashtool: info: interface claimed
rkflashtool: info: reading flash memory at offset 0x00118000
rkflashtool: info: reading flash memory at offset 0x00118020
rkflashtool: info: reading flash memory at offset 0x00118040
rkflashtool: info: reading flash memory at offset 0x00118060
rkflashtool: info: reading flash memory at offset 0x00118080
rkflashtool: info: reading flash memory at offset 0x001180a0
…
Android can store file systems in a number of ways, the most common being:
- yaffs – which can be read through a third party reader, was used extensively prior to Android 4.0.0.
- ext4 – the standard Linux file system, which can be mounted in Linux.
- ext4 with reduced sparse files – this is the default in stock Android after 4.0.0. It can be converted to ext4 with easily available tools.
- FAT32 – for the “sdcard” which can easily be read.
Fortunately all the Rockchip file systems I’ve seen are standard ext4. This means that they can easily be mounted under Linux using the loopback mounting facility:
[dave@jotunheim rkflashtool]$ ls /mnt/mk809/system
batterystats.bin locksettings.db packages.list throttle
called_pre_boots.dat locksettings.db-shm packages.xml uiderrors.txt
dropbox locksettings.db-wal registered_services usagestats
entropy.dat netpolicy.xml shared_prefs users
inputmethod netstats sync
For further confirmation this is the WPA key extraction:
ctrl_interface=wlan0
update_config=1
device_name=ht7s3
manufacturer=Tesco
model_name=Hudl HT7S3
model_number=Hudl HT7S3
serial_number=914Oj01030G41702293
device_type=10-0050F204-5
config_methods=physical_display virtual_push_button keypadnetwork={
ssid=”Wifi Pineapple”
psk=”thisisareallylongpassword”
key_mgmt=WPA-PSK
priority=2
}
root@kali:/tmp/hudl/misc/wifi#
…and this is the hash of the PIN:
root@kali:/tmp/hudl/system# cat password.key
F9E3068A3A67478EF9BC747C23A474DA7E98301EFF6E344AB97CC1AA4A8205D9D557EEE3
And, there we have it: if I can get your device I can access all your data without even unlocking the screen.
An alternative route
Not all Rockchip devices have a special button for placing the device in flash mode, but they all have something called mask mode. Mask mode is an emergency boot loader where, upon booting,
the device cannot read from NAND. There isn’t much to differentiate mask and flash mode, other than how to get into it.
Most storage chips can be forced to return no information if the ready/busy pins of the chip are shorted out during a read operation (note, this may erase the NAND chip, this depends on the NAND in use).
To do this we need to short out pins 6 and 7 of the NAND chip during the power-on boot, using something small and metal like a paper clip or SIM removal tool. This isn’t easy because we’re talking small contact areas in close proximity to others. Below is an image taken through a microscope showing which pins need shorting out, and the end of a SIM removal tool for size comparison:
Conclusion
Is there anything you can do to secure the Hudl? At the moment I’m not sure that there is. I use mine only for browsing, playing music and as an alarm clock. Suggest you do the same.


