


So, for whatever reason you’ve decided that you no longer want your Android device.
It may be you’ve broken the glass and it’s easier to offer it up as spares or repairs than pay some bloke in the market to put a new screen on it. It could be that you want to upgrade.
Whatever the reason, you put it for sale on a popular auction site, or offer it on the local freecycle, but because you want your private details kept private, you wipe it first, using the standard Factory Data Reset option that is in the backup and reset section of the options. You reboot it and it does in fact appear to be like it was when you first bought it. You’re safe: your data can’t be recovered.
Or are you? Unfortunately, no you’re not.
The reason for this is quite simple, although quite hard to explain without getting too technical. So let’s start at the deep end. If you don’t want to know the reasons why then you can skip ahead to see how easy it is to get some of this information back.
One of the advantages of Android over other mobile operating systems is that it is mostly open source – I can check the source code to see what something does. So here’s a quick synopsis of what happens in the source when you tell Android to do a factory reset.
When you request a factory reset you’re normally in the Android operating system, which is currently using the bits of storage that you want wiped. If it tried to wipe your data now then it would most likely crash Android during the process and cause a bricked device. So the first thing it does is to reboot the phone to a special mode known as recovery.
Recovery mode is a special bootable partition that is designed as an emergency resource if the device is in a state where it cannot run the OS (this partition is normally replaced by a custom partition during many techniques of rooting the device).
Because the recovery partition doesn’t have access to Android’s memory and won’t have any encryption keys to talk to Android’s userdata partition (if it is encrypted). Then messages are passed in the cache partition. In the case of a factory reset, a file /cache/recovery/command is created with the contents:
So, the recovery partition then performs the rewrite. We can actually see the process in the comments in the source code: (from https://android.googlesource.com/platform/bootable/recovery/+/android-4.2.2_r1/recovery.cpp)
* FACTORY RESET
* 1. user selects “factory reset”
* 2. main system writes “–wipe_data” to /cache/recovery/command
* 3. main system reboots into recovery
* 4. get_args() writes BCB with “boot-recovery” and “–wipe_data”
* — after this, rebooting will restart the erase —
* 5. erase_volume() reformats /data
* 6. erase_volume() reformats /cache
* 7. finish_recovery() erases BCB
* — after this, rebooting will restart the main system —
* 8. main() calls reboot() to boot main system
Note step 5 – where it wipes /data, i.e. the userdata partition where all user data for the device is stored. Now, let’s have a look at the code for this function: (from https://android.googlesource.com/platform/bootable/recovery/+/android-4.2.2_r1/recovery.cpp)
if (strcmp(v->fs_type, “ext4”) == 0) {
int result = make_ext4fs (v->device, v->length, volume, sehandle);
if (result != 0) {
LOGE(“format_volume: make_extf4fs failed on %s\n”, v->device);
return -1;
}
return 0;
}
The important call that performs the wiping gubbins is make_ext4fs. This is a relatively standard call that formats the partition with a new ext4 file system. You can go and search out the source for this system call if you’re interested and can read C, but, in essence, what this does is to write a new set of superblocks to storage.
A superblock is used by the ext family of file systems to manage the basic metadata of the file system, holding the basic table of inodes (an inode is a block of data that describes a file, its size, its permissions and where it is physically stored in the file system), journals and allocated blocks. (It’s a bit more complicated than that, but for our purposes we don’t need anything more than that).
After this a copy of the default file system structure and files will be written to the partition. This is normally only a few megabytes in size.
So, we’ve overwritten the superblocks and copied over a few MB of files. What about the other 10 gigabytes of data? It’s still there. Or, it’s mostly there – there’s a certain amount of randomness in how a file system will allocate physically storage blocks within the file system.
What we have lost is how to reference our files – we no longer have the inodes and most likely the directories have been destroyed or overwritten (in the ext* file systems a directory is a file which links filenames to inodes). This means we need to make guesses of what is there.
Recovering Data from a Formatted Device
This is not Android specific and the techniques can be used for any formatted device. As another warning, although I have done forensics in the past (I even have a C|HFI qualification, for what little it’s worth); what I’m describing below should not be taken as a guide for recovering information if it is to be used for any legal reasons. In these cases, get a professional to do it. The chain of evidence is very important.
Our first step is to image the data, this could be done via JTAG or, if the device supports it, through the bootloader. This should create a disk image as a file that we can start analysing.
The first thing to try is to mount it on a Linux box/virtual machines and see whether it has been fully wiped. Android can use a number of file systems depending on the version and manufacturer, the most common one you’ll find for Android greater than Ice Cream Sandwich (the 4.0 branch) is ext4 which is the stand Linux file system. You can even mount this on Windows with the right program.
The simplest thing to do is to look through the image for text strings that could indicate information. This can be performed very easily by using the Linux strings command:
Once this has finished (it could take a while on a large volume) we can just look for interesting information in a text editor; or just use grep:
grep –i password diskimage-strings.txt
grep –i autofill diskimage-strings.txt
grep –i psk=\” diskimage-strings.txt
If we’re old style geeks, then a bit of Awk won’t go amiss:

If you’re lucky then you can find a lot of important information in these strings; I’ve read whole sets of credentials, names and address and even the contents of emails before!
The next step is to try and recover some more concrete data: all those naked selfies we read about but never see (believe me, you don’t really want to). As we don’t have the file references we have to do this through a more complex technique: we have to ‘carve’ the data.
Carving is the process of looking through an image for things that look like known file types, then extracting them so that they can be manually reviewed.
For example, if we look at a hexdump of the header and tail of a .jpg file we can see:
00000000 ff d8 ff e0 00 10 4a 46 49 46 00 01 01 01 00 48 |……JFIF…..H|
[dave@jotunheim jpg-0-1]$ hexdump -C 00001000.jpg | tail -2
0000d1e0 05 ff d9
|…|
0000d1e3
[dave@jotunheim jpg-0-1]$
The highlighted are standard bytes that can show the start and end of a JPEG image (usually referred to as the magic numbers). To carve we search through the image for the magic numbers that match the filetypes we’re interested in.
Fortunately there are programs that do this for us. I use scalpel as it’s open source and effective, running it on the image is simple:
This will then create many thousands of files in the scalpelout directory that we can then manually review. And here’s a screen shot to show how much I like to redact stuff:
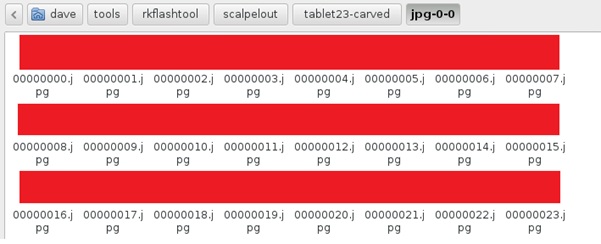
One interesting feature of carving is that JPEG images can have a data chunk which is contains a thumbnail image – a small version of the main image. This is stored as a JPEG image and can be carved out. As these are small images they tend to survive formatting and subsequent use quite easily. These thumbnails have caught some models out in the past where an edited photo has been posted, but the thumbnail contains an unedited image.
I also found something interesting whilst doing this – the standard Android browser takes occasional snippets of web pages, to use them as thumbnails when you look at tabs. These are cached in storage, which means that it is possible to view them afterwards!


